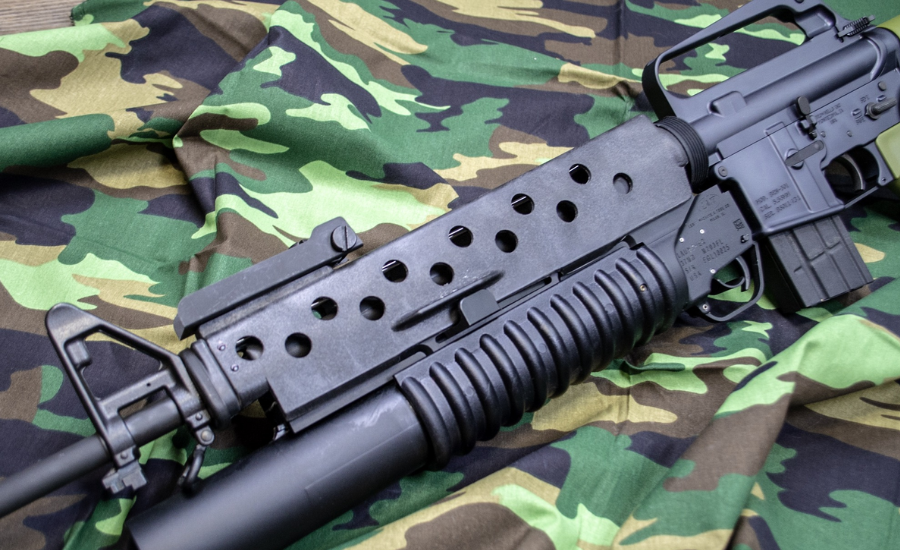
For firearms enthusiasts looking to enhance the functionality and appearance of their rifles, installing a triangle handguard with collar is a pivotal modification. This process not only improves the ergonomics of the rifle but also adds a distinct aesthetic appeal. In this detailed guide, we’ll walk you through the step-by-step procedure to install a triangle handguard with a collar, ensuring a secure and professional fit.
Tools and Materials Required for Installing a Triangle Handguard with Collar
Before embarking on the installing a triangle handguard with collar , it’s crucial to prepare by gathering all the necessary tools and materials. Having everything ready at the outset not only ensures a smooth and efficient process but also minimizes the risk of errors and interruptions. Below is a detailed overview of the tools and materials you will need:
1. Triangle Handguard
- Compatibility: The first step is to ensure that the installing a triangle handguard with collar you have selected is compatible with your specific rifle model. Different firearms may require handguards with varying dimensions, mounting mechanisms, and materials. Check the product specifications to confirm that it matches your rifle’s make and model. A compatible handguard will ensure a secure fit and optimal performance.
- Material and Design: Consider the material of the handguard—common options include aluminum, polymer, and steel. Each material offers different benefits in terms of weight, durability, and heat resistance. The design should also complement the rifle’s aesthetics and your intended use, whether it’s for tactical, hunting, or sport shooting purposes.
2. Collar
- Inclusion with Handguard: Some installing a triangle handguard with collar come with a collar as part of the package, specifically designed to work seamlessly with that handguard. If included, verify that the collar fits your rifle’s barrel and mounting system.
- Purchasing Separately: If the handguard does not come with a collar, you’ll need to purchase one separately. Ensure that the collar is compatible with both your rifle and the handguard. It should be made of high-quality material, such as steel or aluminum, to provide a durable and stable base for the handguard.
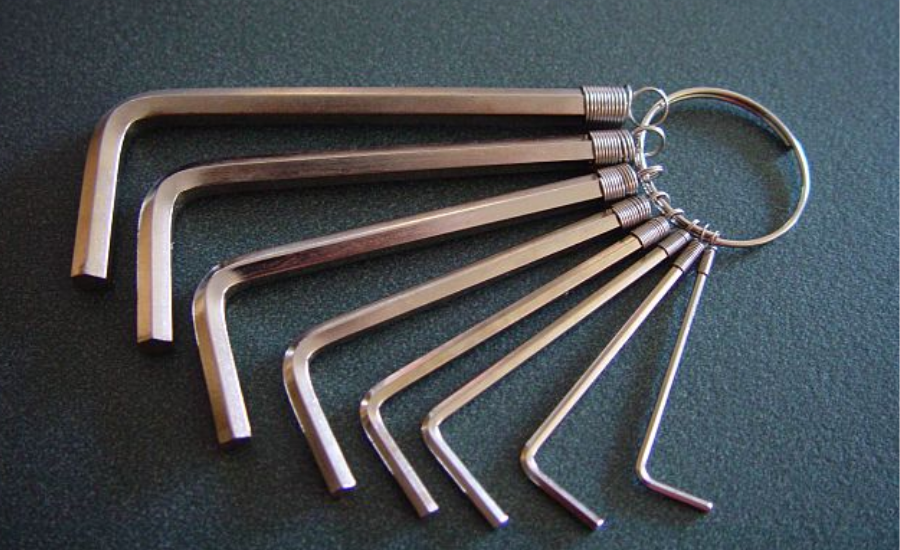
3. Screwdriver or Allen Wrenches
- Type of Fasteners: The choice between a screwdriver or Allen wrenches depends on the type of fasteners used with your specific handguard. Some handguards may require Phillips or flathead screws, while others use hex bolts that need Allen wrenches.
- Quality and Fit: Use tools that fit the fasteners perfectly to avoid stripping the screws or bolts. High-quality tools provide better grip and control, making the installation process smoother and more efficient. It’s advisable to have a set of both screwdrivers and Allen wrenches on hand to cover all possibilities
4. Torque Wrench
- Precision Tightening: A torque wrench is essential for applying the correct amount of force when tightening screws or bolts. Over-tightening can damage components or threads, while under-tightening may result in a loose handguard that affects the rifle’s performance.
- Manufacturer’s Specifications: Always refer to the manufacturer’s guidelines for the recommended torque settings. These settings are crucial for ensuring that the handguard remains securely attached during use, providing both safety and reliability.
5. Loctite (Thread Locker)
- Preventing Loosening: Loctite, or a similar thread locker, is used to secure screws and bolts, preventing them from loosening over time due to vibration or recoil. This is especially important in firearms, where maintaining a tight and secure fit is essential for safety and accuracy.
- Application: Apply a small amount of Loctite to the threads of the screws or bolts before installation. This will keep them firmly in place, reducing the need for frequent re-tightening and maintenance.
6. Cleaning Supplies
- Prepping the Installation Area: Before installing a triangle handguard with collar it’s vital to clean the installation area on your rifle. Dirt, dust, and oil can interfere with the fit of the components, potentially leading to alignment issues or improper seating.
- Recommended Supplies: Use a soft cloth, cleaning solvent, and brushes to thoroughly clean the barrel, barrel nut, and surrounding areas. Ensure that all residues are removed to create a clean surface for the installation. This step is essential for achieving a secure and professional finish.
7. Gun Oil
- Lubricating Moving Parts: Applying gun oil to the contact points between the collar, handguard, and barrel is an important step in the installation process. Lubrication facilitates smoother installation, prevents rust and corrosion, and ensures that the components can be easily adjusted if needed.
- Application Tips: Use a light coat of oil, focusing on areas where metal parts come into contact. Be careful not to over-apply, as excess oil can attract dirt and dust, leading to potential issues down the line.
Step-by-Step Installation Guide
1. Preparation
Safety First: Always ensure your firearm is unloaded before beginning any modifications. Double-check that the chamber is clear. Adhering to safety protocols is critical when working with firearms.
Clean the Area: Thoroughly clean the area where the handguard will be installed. Removing dirt, dust, or any other debris will ensure a better fit and reduce the risk of damage to the components.
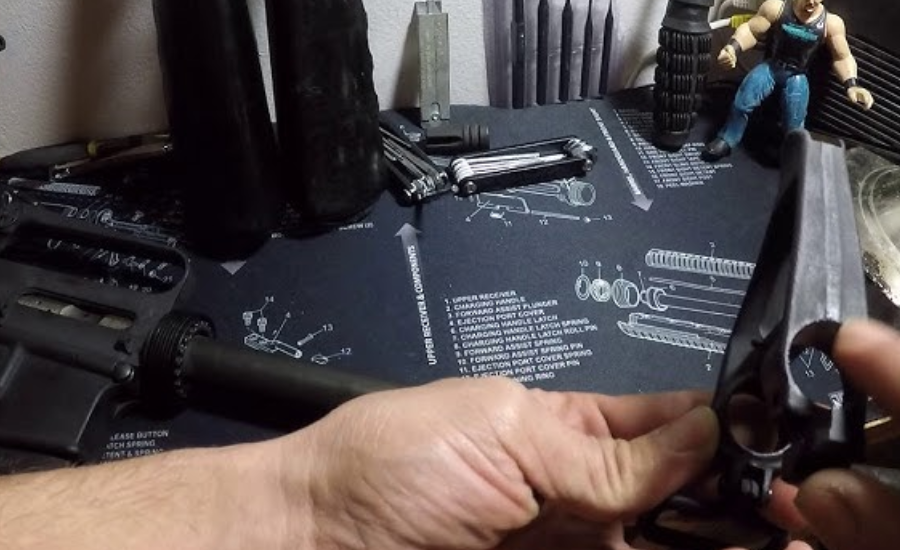
2. Removing the Existing Handguard
Detach the Old Handguard: Depending on your rifle’s design, you may need to remove screws, pins, or a retaining ring to take off the existing handguard. Follow your firearm’s specific instructions.
Inspect the Barrel Nut: Check the condition of the barrel nut and any other related components. Replace or clean them as needed to ensure they are in good working order.
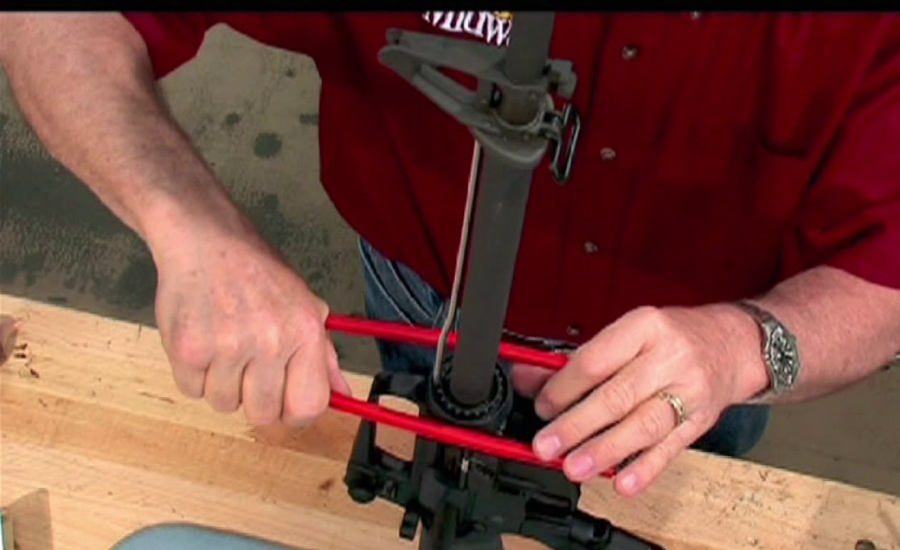
3. Installing the Collar
Position the Collar: Carefully place the collar on the barrel or the designated area on the rifle. Make sure it aligns perfectly with the handguard’s mounting points.
Secure the Collar: Use the appropriate screws, bolts, or pins to attach the collar. A torque wrench should be used to achieve the recommended torque settings, ensuring a secure attachment. Applying a thread locker like Loctite to the threads can help prevent loosening over time.
4. Preparing the Installing a triangle handguard with collar
Check Compatibility: Verify that the triangle handguard is compatible with the collar and your rifle’s mounting system. Some handguards offer adjustable fittings to accommodate various models.
Lubricate Contact Points: Apply a small amount of gun oil to the contact points between the handguard and collar. This will facilitate a smoother installation and help prevent corrosion.
5. Installing the Triangle Handguard
Align the Handguard: Carefully position the triangle handguard onto the collar, ensuring that all mounting points are correctly aligned.
Attach the Handguard: Use the provided screws or bolts to secure the handguard to the collar. Make sure to tighten them evenly to avoid any misalignment or uneven fit.
Check for Stability: After installation, check for any movement or play in the handguard. It should be firmly attached without any wobbling or instability.
6. Final Adjustments
Inspect the Installation: Ensure all fasteners are tightened according to the manufacturer’s specifications. The handguard should be securely aligned and properly fitted.
Test the Fit: Handle the rifle and check that the handguard does not interfere with the firearm’s operation. Ensure there are no obstructions or issues with the rifle’s functionality.
7. Clean Up
Remove Excess Loctite and Oil: Wipe away any excess Loctite or oil from the installation area to maintain a clean and polished finish.
Store Tools and Materials: Clean and store all tools and materials used during the installation process to keep them in good condition for future use.
Tips for a Successful Installation of a Triangle Handguard with a Collar
Installing a triangle handguard with a collar can significantly enhance both the aesthetics and functionality of your rifle. To ensure a successful installation that is both secure and precise, consider the following tips:
1. Read the Manual Thoroughly
- Manufacturer’s Instructions: The first and most important step before starting the installation is to thoroughly read the manufacturer’s manual that comes with your handguard and collar. Each rifle model and handguard may have specific instructions or unique considerations that must be followed to ensure a proper fit.
- Understanding Components: The manual will typically include diagrams, torque specifications, and detailed step-by-step instructions tailored to your firearm. By following these instructions, you can avoid common pitfalls and ensure that each component is installed correctly.
- Safety Precautions: Manuals also provide crucial safety information, such as recommended handling practices and warnings. Adhering to these guidelines not only protects you from potential harm but also helps maintain the longevity and performance of your rifle.
2. Use Proper Tools for Every Step
- Tool Compatibility: Using the right tools is essential for a smooth installation process. Improper tools can damage screws, bolts, or other components, leading to an insecure fit or even rendering parts unusable. For instance, using a mismatched screwdriver can strip the head of a screw, while an incorrectly sized wrench might slip and cause damage.
- Tool Quality: Invest in high-quality tools that fit perfectly with the fasteners used on your handguard and collar. High-quality tools provide better control, reduce the risk of slippage, and can make the installation process more efficient and precise.
- Specialized Tools: If the installation requires specialized tools such as a torque wrench or specific types of screwdrivers, ensure you have them on hand before beginning. Attempting to substitute these tools with makeshift alternatives can lead to improper installation and potential safety hazards.
3. Double-Check Torque Settings
- Importance of Torque: Proper torque application is critical in ensuring that the handguard and collar are securely attached to the rifle. Over-tightening screws or bolts can strip threads or deform components, compromising the integrity of the installation. On the other hand, under-tightening can result in a loose fit, which may cause the handguard to shift or detach during use, affecting the rifle’s accuracy and safety.
- Using a Torque Wrench: A torque wrench is an invaluable tool for applying the precise amount of force required. Follow the manufacturer’s torque specifications, which are usually provided in the manual, to ensure that each fastener is tightened to the exact recommended level. This precision ensures that the handguard remains stable and secure throughout its use.
- Rechecking After Installation: After completing the installation, it’s a good practice to recheck the torque settings on all fasteners. This double-check helps confirm that everything is tightened to the correct specifications, reducing the risk of components loosening over time due to recoil or handling.
4. Prepare the Work Area
- Organize Your Space: Before starting the installation, organize your work area to ensure that all tools and materials are within easy reach. A clutter-free workspace helps prevent accidents and allows you to focus on the installation process.
- Adequate Lighting: Ensure that your work area is well-lit. Proper lighting helps you see small details clearly, such as screw threads and alignment points, which are crucial for precise installation.
5. Take Your Time
- Avoid Rushing: Rushing through the installation process can lead to mistakes, such as misaligned components or improperly tightened screws. Take your time to ensure that each step is completed correctly.
- Attention to Detail: Pay close attention to details, especially during the alignment and tightening stages. Proper alignment ensures that the handguard fits seamlessly with the collar and rifle, while consistent tightening ensures even distribution of force across all fasteners.
6. Test the Installation
- Check for Stability: After installation, thoroughly check the stability of the handguard. There should be no wobbling, shifting, or movement when you handle the rifle. The handguard should feel solid and secure, with all components fitting snugly together.
- Functionality Test: Before taking your rifle out for use, perform a functionality test to ensure that the handguard does not interfere with the rifle’s operation. Check that the rifle cycles properly and that all controls are accessible and unobstructed by the new handguard.
7. Routine Maintenance
- Regular Inspections: Even after a successful installation, it’s important to periodically inspect the handguard and collar for signs of wear, loosening, or damage. Regular maintenance helps ensure that your rifle remains in peak condition and that the handguard stays securely in place.
- Reapply Loctite if Needed: Over time, the effects of recoil and environmental conditions may loosen screws or bolts. Reapply Loctite to any fasteners that show signs of loosening to maintain a secure fit.
Facts
- Triangle Handguard Installation: Installing a triangle handguard enhances the functionality and appearance of a rifle by offering improved ergonomics and a distinctive look.
- Compatibility Check: It’s essential to ensure that the triangle handguard and collar are compatible with your specific rifle model to guarantee a secure and functional fit.
- Material Choices: Triangle handguards can be made from various materials such as aluminum, polymer, or steel. Each material offers different benefits regarding weight, durability, and heat resistance.
- Tools Required: The installation requires specific tools, including a triangle handguard, collar, screwdriver or Allen wrenches, a torque wrench, Loctite (thread locker), cleaning supplies, and gun oil.
- Torque Specifications: Proper torque settings are crucial for securing the handguard and collar. Over-tightening or under-tightening can lead to issues with stability and performance.
- Thread Locker: Applying a thread locker like Loctite helps prevent screws and bolts from loosening over time due to vibration or recoil.
- Routine Maintenance: Regular inspections and maintenance are necessary to ensure the handguard remains securely attached and in good condition.
FAQs
Q1: How do I know if the triangle handguard and collar are compatible with my rifle?
A1: Check the product specifications for both the handguard and collar to ensure they match your rifle’s make and model. Manufacturer’s manuals often provide compatibility information.
Q2: What types of materials are available for triangle handguards, and how do they differ?
A2: Triangle handguards are commonly made from aluminum, polymer, or steel. Aluminum is lightweight and durable, polymer is often lighter and more affordable, while steel offers superior strength and heat resistance.
Q3: Why is a torque wrench important for this installation?
A3: A torque wrench ensures that screws and bolts are tightened to the manufacturer’s recommended specifications. This prevents over-tightening, which can damage components, and under-tightening, which can result in a loose handguard.
Q4: How do I use Loctite effectively in the installation process?
A4: Apply a small amount of Loctite to the threads of the screws or bolts before installation. This helps secure them in place and prevents them from loosening due to vibration or recoil.
Q5: What should I do if I notice the handguard loosening over time?
A5: Periodically inspect the handguard and collar for any signs of loosening or wear. If necessary, reapply Loctite to the fasteners and tighten them according to the manufacturer’s specifications.
Q6: Can I install the triangle handguard myself, or should I seek professional help?
A6: Installing the triangle handguard yourself is feasible if you have the necessary tools and follow the instructions carefully. However, if you’re unsure or uncomfortable with the process, seeking professional assistance is advisable.
Conclusion
Installing a triangle handguard with a collar is a valuable upgrade for rifle enthusiasts seeking to enhance their firearm’s performance and appearance. By ensuring compatibility, using the right tools, adhering to torque specifications, and applying thread locker, you can achieve a secure and professional installation. Following these steps and tips will help ensure that the handguard performs optimally and remains stable during use.
Routine maintenance and inspections are crucial to keep the handguard in good condition and prevent any issues with its fit or functionality. Whether you’re a seasoned gunsmith or a DIY enthusiast, careful attention to detail and proper installation practices will contribute to a successful upgrade that enhances both the look and functionality of your rifle.
Read More:News Week Blog